
How to Prepare Walls for Painting
Preparing walls before painting is crucial to ensure a flawless finish. If you don't do this, it could result in peeling paint and uneven surfaces or even cracks through the paint.
No matter if you are painting a plastered wall new or an old wall with flaky plaster or wallpaper bits, preparation is essential.
Clean the Walls
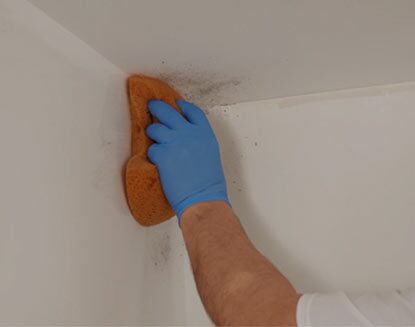
Before you paint, clean your walls. This is essential for protecting your paint and ensuring a beautiful end result.
It's easy to forget about this step. But if you really want to renovate your home, you'll need to do everything possible to ensure that your walls are in great shape.
You can wash your walls with water and mild detergent if they have been painted. This will remove all dirt and debris.
However, if your walls are especially dirty, you might need to use a more aggressive cleaning method.
White vinegar can be used to clean dirty walls. However, warm water and dish soap are also good options. If you have stubborn stains that are not easily removed by regular cleaning products, you might consider making a paste out of baking soda water.
Get Rid of All Debris
Remove all debris from your walls if you want your paint job look great and lasts a long while. This includes dirt, cobwebs, or dust.
You can often use a broom or vacuum cleaner with an extension handle to clean rooms that have not been used much. To reach tight corners or difficult-to get to areas, you can attach a microfibercloth to the end.
Once you have cleared away all the dust and dirt from your walls it's now time to wash them. This can be done easily with some soap and water.
You might need to prepare a cleaning solution for walls that are particularly filthy. TSP or other similar cleaners may be necessary if you have grease on the walls of your kitchen or crayon marks on your kids' rooms.
Fill Cracks, Holes and Leaks
If you're painting walls, don't forget to fill in any holes or cracks. These imperfections can be filled quickly and easily so that the final project looks flawless.
Apply a small amount to the crack using a putty blade. Then push the compound in by pushing down. Removing any excess material, tape the cracks with mesh tape.
You can use spackling to create ceilings. This will ensure that all filler is distributed evenly and prevents it slipping back into your hole.
To make it level, sand any cracks or holes before you paint. This will help the repaired crack or hole blend in with the rest of your wall and maintain a beautiful painted finish. You should always use a dust mask when you sand so that you don’t inhale any particles.
Sand the Walls
Sanding walls before you paint them will give them a uniform texture. This is vital for paint to stick well. This step is required regardless of wall material and previous paint texture.
The desired outcome will determine which grit level of sandpaper to use. Grit 220 can give you a rougher look, while Grit320 will smoothen most surfaces.
Before you start sanding walls, clean them well. This will remove any dirt or hair that may have been accumulated.
Use a sanding tool and 80-grit sandpaper for sanding the wall. Make circular movements to eliminate any large ridges.
Once walls are sanded they can be primed. Primer will protect your walls from bleed-through. It will also ensure that your paint stays in place for a long time.
413 Turnberry Way Souderton, PA 18964
Preparing walls before painting is crucial to ensure a flawless finish. If you don't do this, it could result in peeling paint and uneven surfaces or even cracks through the paint. No matter if you are painting a plastered wall new or an old wall with flaky plaster or wallpaper bits, preparation is essential. Clean…